RabbitMQ on Atria v15
RabbitMQ Overview
- RabbitMQ is an Open Source Message Broker, it is a lightweight and easy to deploy platform that enables Atria service components to securely communicate asynchronously with each other.
- RabbitMQ is a core part of Atria’s modernisation and replaces the Microsoft MessageQueue technology which has been in Atria for the past 15 years.
- Rabbit provides a communication backbone to Atria and enables us to reduce the complexity involved in the different aspects of provisioning. Consumers (services) make an outbound connection to the broker and subscribe to queues in order to receive and process messages.
- Messages are sent over encrypted channels using AMQPS, this is an industry standard for secure messaging.
- RabbitMQ should run along as a background service and by default we will install this onto the Provisioning Server. Find out more at https://rabbitmq.com
RabbitMQ Installation
Erlang Installation
Before installing RabbitMQ, Please install the latest version of Erlang - Erlang is a programming language that RabbitMQ uses for Messaging.
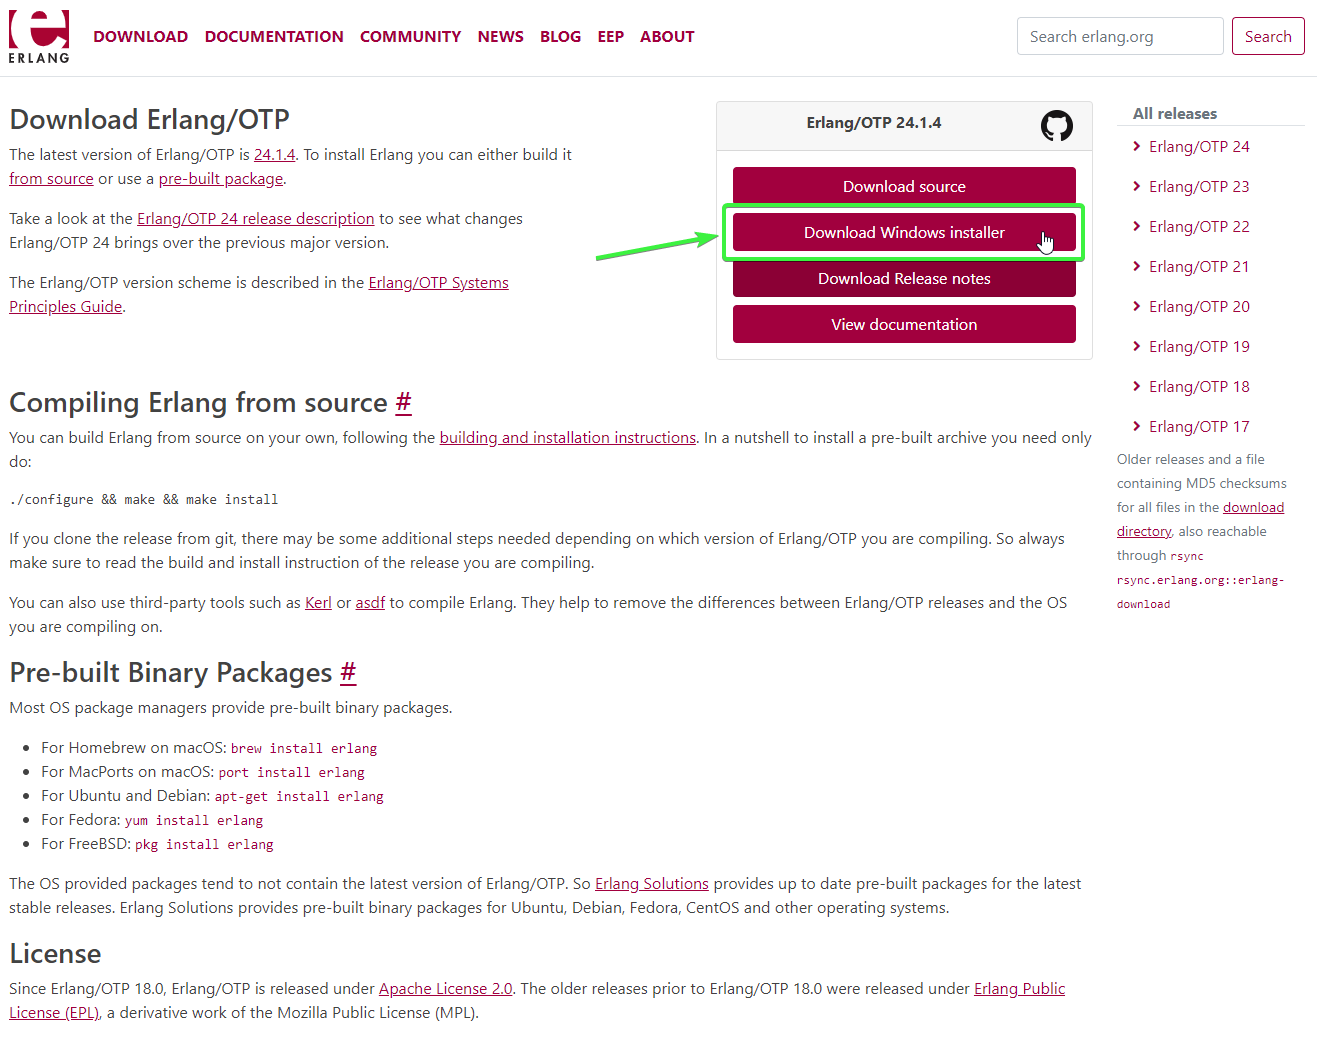
Please navigate to the Erlang website (Downloads - Erlang/OTP) and select the "Download Windows Installer" button as shown below. The latest version should always be selected
RabbitMQ Installation

The Atria Installer domain account can also be used to install RabbitMQ
For Atria 15+ RabbitMQ is a required core component. This should be installed on the Provisioning Server. Open the Hyperlink to go to the RabbitMQ website (https://www.rabbitmq.com/install-windows.html#installer), Please select the highlighted link (As shown in the screenshot below) and install the RabbitMQ Application
Prior to Installation, setup the RabbitMQ_BASE Path

This will be a folder location where the files, logs and config for RabbitMQ will be stored. This will make sure that it is not stored on the User's profile.
1. Create a directory to where RabbitMQ_BASE path will be pointed going forward (i.e. C:\AtriaRabbitMQ)
2. Set the EnvironmentVariable. Open PowerShell (admin) then run the commands:
$rabbitdir = 'C:\AtriaRabbitMQ'
[Environment]::SetEnvironmentVariable("RABBITMQ_BASE", $rabbitdir, "Machine")
This can be done manually as well on the UI.
3. Restart PowerShell and Verify that the EnvironmentVariable is set properly.
[Environment]::GetEnvironmentVariables()
4. Proceed with installation of RabbitMQ software
Now, after these two pieces of software are installed (Erlang and RabbitMQ), using PowerShell, navigate to the below file path
'C:\Program Files\RabbitMQ Server\rabbitmq_server-\sbin\'
For example, we have RabbitMQ Server 3.8.11 installed, so we navigate to the folder path of 'C:\Program FIles\RabbitMQ Server\rabbitmq_server-3.8.11\sbin'

Enable Management Web UI
- .\rabbitmq-plugins enable rabbitmq_management
Once the above command successfully runs, you can access the management environment via http://localhost:15672/#
Here is the login page when management plugin is successfully working:
Here is the login page when management plugin is successfully working:

Default Username and Password id:
guestHere is the look of the management dashboard once you successfully login:

Add admin user
Next, we need to configure a RabbitMQ Web Account
This is purely an account for administering RabbitMQ
Please configure a new account for this and set the password in commands below. This will need to be used later in the configuration, so please save these credentials in a secure location.
- .\rabbitmqctl add_user 'rabbitmq admin account username' 'rabbitmq admin account password'
- .\rabbitmqctl set_permissions -p / 'rabbitmq admin account username' ".*" ".*" ".*"
- .\rabbitmqctl set_user_tags 'rabbitmq admin account username' administrator
Delete default guest user
Next, we need to remove the inbuilt "Guest" account - Please do this with the command below.
- .\rabbitmqctl delete_user guest
Setup the Windows Firewall for RabbitMQ
Next, we need to set Inbound Rules on the Provisioning Server where RabbitMQ is installed. Please do this with the command below
- New-NetFirewallRule -DisplayName "RabbitMQ" -Direction Inbound -Protocol TCP -Action Allow -LocalPort 5672,5671,15672,15671
RabbitMQ Configuration for Atria
Setup RabbitMQ CNAME Record:
Add a host record to your DNS server to ensure rabbitmq instance can be accessible by atria:
| CNAME | Target server | Notes |
| RabbitMQ FQDN i.e. AtriaMessaging.domain.local | This indicates to the server name where you have installed your Rabbitmq instance (Provisioning Server) | Where RabbitMQ server will be installed. |

After setting up the DNS record, you may test to load the RabbitMQ Web Management UI on your browser (i.e. http://atriamessaging.domain.local)
SSL Configuration
Certificates
Extracting .PEM format certificates from .PFX - Most of the time windows based certificates come in the .pfx format, as RabbitMQ needs these in a PEM format, we need to convert them to this format.
For this guide, we are using OpenSSL. This can be installed from this link (https://slproweb.com/products/Win32OpenSSL.html)
After this is installed, navigate to the path via Command Prompt that the openSSL was installed to (By default, this is 'C:\Program Files\OpenSSL-Win64\bin').
For example, I navigated to this path, and now I have the option to run commands against openssl.exe
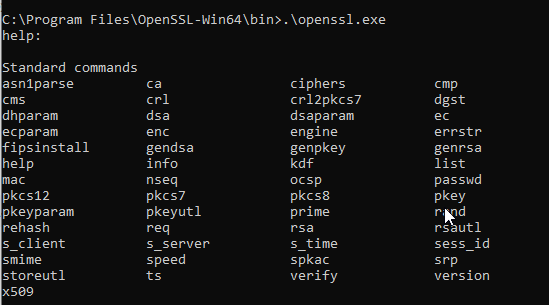
For example, I navigated to this path, and now I have the option to run commands against openssl.exe
Copy the .pfx certificate to a easy to access path (I'd recommend C:\Program FIles\OpenSSL-Win64\bin\Certs)
We can use openssl to convert from pfx to pem using the command below:
- .\openssl pkcs12 -in 'Certs\a101labs.pfx' -out Certs\cacertfile.pem
- .\openssl rsa -in 'Certs\cacertfile.pem' -out Certs\keyfile.pem
With these two files, (cacertfile.pem and keyfile.pem) you can now continue onto the next Configuration step
RabbitMQ AMQPS Config
Create a RabbitMQ.conf file in the RABBITMQ_BASE path that was set. (C:\AtriaRabbitMQ)
Add this content to the file to configure SSL
- listeners.ssl.default = 5671
- ssl_options.cacertfile = /path/to/server_certificate.pem
- ssl_options.certfile = /path/to/server_certificate.pem
- ssl_options.keyfile = /path/to/server_key.pem
- ssl_options.verify = verify_none
- ssl_options.fail_if_no_peer_cert = false
- management.ssl.port = 15671
- management.ssl.cacertfile = /path/to/server_certificate.pem
- management.ssl.certfile = /path/to/server_certificate.pem
- management.ssl.keyfile = /path/to/server_key.pem
We recommend to use the RABBITMQ_BASE path for storing the SSL Certificates. A "Certs" folder can be created on the same location. (C:\AtriaRabbitMQ\Certs)
Otherwise, it can be a folder location where your certs are stored.
So, the full configuration file will look like the below with the relevant paths.
After adding this file you need to:
- Stop RabbitMQ service (Via Windows Services)
- Remove the RabbitMQ service using the tool in the start menu called "RabbitMQ Service - remove"(see screenshot below)
- Re-install RabbitMQ service using the tool in the start menu called "RabbitMQ Service - (re)Install" (see screenshot below)
FAQ
Inquiry/Question | Answer |
| Does RabbitMQ only need to be installed on the main provisioning server or also on remote ad provisioning servers? | RabbitMQ will only be installed and configured on the Main Provisioning Server |
Do all provisioning servers need to be able to reach all provisioning servers via ports 15671 and 15672? | The ports, (15671 – HTTPS, 15672 – HTTP, 5671 – AMQPS, 5672 - AMQP) will only be for the main provisioning server.We can keep SSL and Non-SSL Ports in the meantime just in case issues arise when setting it up |
Do remote AD webservices need to be connected with open ports according to the specifications to the main provisioning server or to the remote ad provisioning server? | By default web services are passing through 8095 together with the ports to contact the web and main provisioning, as we move forward all request will pass through AtriaHTTPTunnel (8101) and AtriaExternalApi (front-end web server via 80/443) |
For which domain names do the certificates for RabbitMQ need to apply? | The RabbitMQ certificate will be under the main domain. It will then be configured for the remote environment to point to the FQDN of the RabbitMQ and be accessible |
Does the SSL certificate for RabbitMQ then needs to be trusted not only in the primary location but also in all remote Ads as well? | Yes, the SSL certificate for RabbitMQ should be trusted on all remote ADs. You need to add the aliases to the certificate SAN Example: Internal FQDN: atriamessaging.internal.local Public FQDN: atriameeaging.company.com Server FQDN: prov01.internal.local The copy of the internal RootCA will be applied on the remote ADs (if self-signed), otherwise if this is a known certificate signer (verisign, etc) The FQDN should be resolvable on the DNS of the remote AD. |
Related Articles
Updating Erlang and RabbitMQ to latest version in Atria
Overview This article explains and shows the requirements and steps for Erlang and RabbitMQ Upgrade. Details of Erlang and RabbitMQ Upgrade Upgrading RabbitMQ can be done via in-place upgrade but will step through each version- as per RabbitMQ ...Investigating Provisioning Stuck Messages in RabbitMQ
Overview This is a working document for investigating stuck messages in RabbitMQ queue. Key points Unacked Messages are "unacknowledged messages". It's a message that is sent to but not successfully completed and just got stuck in the processing. ...Atria Billing Setup User Guide
Objective This article describes how to configure Atria to utilize the latest billing features. This document outlines the billing setup attributes that should be configured. Applies to Introduced in Atria version 12.0.0 Billing Setup Overview To ...Supportability Matrix
Product Lifecycle Product/Component Name Language Version EOM EOL CloudPortal Services Manager EN 11.5.8.2 (CU4) 31 May 2016 31 Dec 2019 Atria EN 12.6, 12.7 31 Jun 2021 31 Dec 2021 Atria EN 12.13.X 31 Jun 2022 31 Dec 2022 Atria EN 15.X Current EOM - ...Moving RabbitMQ_BASEPATH to a Directory Instead of the Default User Profile
Overview By default when installing and configuring RabbitMQ, the BASEPATH for all config, logs, plugins, and instances are pointed to the %appdata% of the User that did the installation. Using this article, the RABBITMQ_BASEPATH will be moved to a ...